
티스토리 뷰
블로그 글 목록 뷰, 글 뷰 만들기, 삭제/수정/생성 기능
완벽한 장면 2023. 10. 15. 18:371. 블로그 글 목록 뷰 구현하기
1-1. 컨트롤러 메서드
1) DTO 구현 - ArticleListViewResponse
@Getter
public class ArticleListViewResponse {

    private final Long id;
    private final String title;
    private final String content;

    public ArticleListViewResponse(Article article) {
        this.id = article.getId();
        this.title = article.getTitle();
        this.content = article.getContent();
    }
}
2) BlogViewController - getArticles() 메서드 구현하기
@RequiredArgsConstructor
@Controller
public class BlogViewController {

    private final BlogService blogService;

    @GetMapping("/articles")
    public String getArticles(Model model) {
        // 블로그 글 목록을 조회하고, 각 글을 ArticleListViewResponse 객체로 변환하여 리스트로 저장
        List<ArticleListViewResponse> articleList
                = blogService.findAll()
                .stream()
                .map(ArticleListViewResponse::new)
                .toList();

        // 블로그 글 목록을 뷰에서 사용할 수 있도록 모델에 추가
        model.addAttribute("articles", articleList); // 블로그 글 리스트 저장

        // "articleList" 뷰를 반환
        return "articleList"; // 뷰 조회
    }

}
1-2. HTML 뷰 만들기 - articleList.html
<!DOCTYPE html>
<html xmlns:th="http://www.thymeleaf.org">
<head>
    <meta charset="UTF-8">
    <title>블로그 글 목록</title>
    <link rel="stylesheet" href="https://stackpath.bootstrapcdn.com/bootstrap/4.1.3/css/bootstrap.min.css">
</head>
<body>
    <div class="p-5 mb-5 text-center</> bg-light">
        <h1 class="mb-3">My Blog</h1>
        <h4 class="mb-3">블로그에 오신 것을 환영합니다.</h4>
    </div>

    <div class="container">
        <div class="row-6" th:each="item : ${articles}">
            <div class="card">
                <div class="card-header" th:text="${item.id}">
                </div>
                <div class="card-body">
                    <h5 class="card-title" th:text="${item.title}"></h5>
                    <p class="card-text" th:text="${item.content}"></p>
                    <a th:href="#" class="btn btn-primary">보러가기</a>
                </div>
            </div>
            <br>
        </div>
    </div>
</body>
1-3. 실행 테스트하기
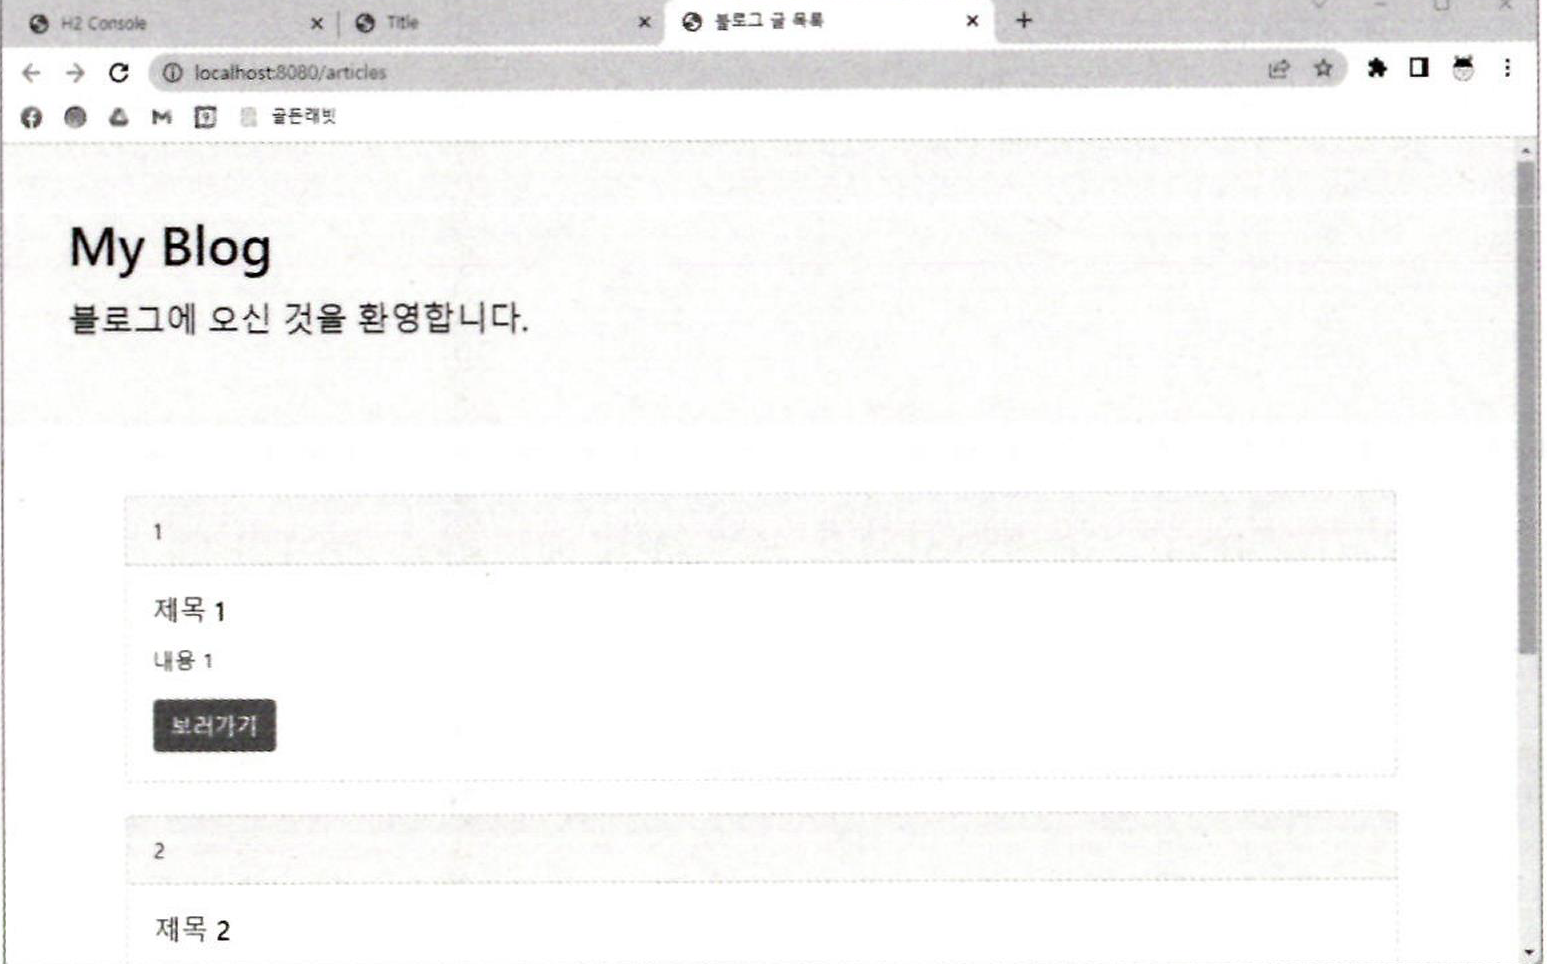
2. 블로그 글 뷰 구현하기
2-1. 엔티티에 생성, 수정 시간 추가
1) Article.java
@Entity
@Getter
@NoArgsConstructor(access = AccessLevel.PROTECTED) // 기본 생성자 protected로 만들기
public class Article {

    @Id
    @GeneratedValue(strategy = GenerationType.IDENTITY)
    @Column(name = "id", updatable = false)
    private Long id;

    @Column(name = "title", nullable = false)
    private String title;

    @Column(name = "content", nullable = false)
    private String content;


    // 생성, 수정시간 추가
    @CreatedDate // 엔티티가 생성될 때 생성시간 저장
    @Column(name = "created_at")
    private LocalDateTime createdAt;

    @LastModifiedDate // 엔티티가 수정될 때 수정 시간 저장
    @Column(name = "updated_at")
    private LocalDateTime updatedAt;


    @Builder // 빌더 패턴 객체 생성
    public Article(String author, String title, String content) {
        this.author = author;
        this.title = title;
        this.content = content;
    }

    public void update(String title, String content) {
        this.title = title;
        this.content = content;
    }
}
2) data.sql 수정
INSERT INTO article (title, content, created_at, updated_at) VALUES ('제목 1', '내용 1', NOW(), NOW())
INSERT INTO article (title, content, created_at, updated_at) VALUES ('제목 2', '내용 2', NOW(), NOW())
INSERT INTO article (title, content, created_at, updated_at) VALUES ('제목 3', '내용 3', NOW(), NOW())
3) SpringBootApplication에 어노테이션 추가
@EnableJpaAuditing // 이거
@SpringBootApplication
public class SpringBootDeveloperApplication {
    public static void main(String[] args) {
        SpringApplication.run(SpringBootDeveloperApplication.class, args);
    }
}
Article.java 에도 어노테이션 추가
@EntityListeners(AuditingEntityListener.class) // 이거
@Entity
@Getter
@NoArgsConstructor(access = AccessLevel.PROTECTED) // 기본 생성자 protected로 만들기
public class Article { }
2-2. 컨트롤러 구현하기
1) DTO 추가 - ArticleViewResponse
@NoArgsConstructor
@Getter
public class ArticleViewResponse {

    private Long id;
    private String title;
    private String content;
    private LocalDateTime createdAt;
    private String author;

    public ArticleViewResponse(Article article) {
        this.id = article.getId();
        this.title = article.getTitle();
        this.content = article.getContent();
        this.createdAt = article.getCreatedAt();
        this.author = article.getAuthor();
    }
}
2) 컨트롤러에 메서드 구현 - getArticle()
@RequiredArgsConstructor
@Controller
public class BlogViewController {

    private final BlogService blogService;

    @GetMapping("/articles")
    public String getArticles(Model model) {
        // 블로그 글 목록을 조회하고, 각 글을 ArticleListViewResponse 객체로 변환하여 리스트로 저장
        List<ArticleListViewResponse> articleList
                = blogService.findAll()
                .stream()
                .map(ArticleListViewResponse::new)
                .toList();

        // 블로그 글 목록을 뷰에서 사용할 수 있도록 모델에 추가
        model.addAttribute("articles", articleList); // 블로그 글 리스트 저장

        // "articleList" 뷰를 반환
        return "articleList"; // 뷰 조회
    }


// 추가

    @GetMapping("/articles/{id}")
    public String getArticle(@PathVariable Long id, Model model) {
        // 요청된 ID에 해당하는 블로그 글을 블로그 서비스를 통해 조회
        Article article = blogService.findById(id);
        // 조회한 블로그 글을 "article"라는 이름으로 모델에 추가
        model.addAttribute("article", new ArticleViewResponse(article));

        return "article"; // "article" 뷰를 반환
    }

}
2-3. HTML 뷰 만들기
1) article.html
<!DOCTYPE html>
<html xmlns:th="http://www.thymeleaf.org">
<head>
  <meta charset="UTF-8">
  <title>블로그 글</title>
  <link rel="stylesheet" href="https://stackpath.bootstrapcdn.com/bootstrap/4.1.3/css/bootstrap.min.css">
</head>
<body>
<!-- 페이지 상단의 헤더 영역 -->
  <div class="p-5 mb-5 text-center</> bg-light">
    <h1 class="mb-3">My Blog</h1>
    <h4 class="mb-3">블로그에 오신 것을 환영합니다.</h4>
  </div>

<!-- 블로그 글 내용을 표시하는 컨테이너 -->
  <div class="container mt-5">
    <div class="row">
      <div class="col-lg-8">
        <article>
          <header class="mb-4">
            <h1 class="fw-bolder mb-1" th:text="${article.title}"></h1>  <!-- 블로그 글의 제목을 출력 -->
            <!-- 글쓴이 정보를 알 수 있도록 록 코드 수정 -->
            <div class="text-muted fst-italic mb-2" th:text="|Posted on ${#temporals.format(article.createdAt, 'yyyy-MM-dd HH:mm')} By ${article.author}|"></div>
          </header>
          <section class="mb-5">
            <p class="fs-5 mb-4" th:text="${article.content}"></p> <!-- 블로그 글의 내용을 출력 -->
          </section>
          <button type="button" id="modify-btn"
                  class="btn btn-primary btn-sm">수정</button>
          <button type="button" id="delete-btn"
                  class="btn btn-secondary btn-sm">삭제</button>
        </article>
      </div>
    </div>
  </div>

</body>- 템플릿 함수 중 ${#temporals.format()}은 날짜 형식을 yyyy-MM-dd HH:mm으로 포매팅한다.
- 포매팅한 날짜 형식을 | | 기호와 함께 Posted on이라는 텍스트와 붙인 점도 주의할 내용.
그러면 블로그 결과물에 ‘2099-99-31 23:11 Posted on 같이 글을 게시한 시간 알림을 표시할 수 있다.
2) alticleList.html - 글 보러 가기 수정
=> href 속성을 th:href 속성으로 변경하고 URL 표현식 @{...} 을 사용해 [보러 가기] 버튼 클릭 시
주소창의 값을 /articles/{item.id}로 변경해 글 상세 화면으로 이동하게 만들기
글 상세 부분은 글 리스트 화면에서 확인 가능해야....
<!DOCTYPE html>
<html xmlns:th="http://www.thymeleaf.org">
<head>
    <meta charset="UTF-8">
    <title>블로그 글 목록</title>
    <link href="https://stackpath.bootstrapcdn.com/bootstrap/4.1.3/css/bootstrap.min.css" rel="stylesheet">
</head>
<body>
<div class="p-5 mb-5 text-center</> bg-light">
    <h1 class="mb-3">My Blog</h1>
    <h4 class="mb-3">블로그에 오신 것을 환영합니다.</h4>
</div>

<div class="container">
    <div class="row-6" th:each="item : ${articles}"> <!--article 개수만큼 반복 -->
        <div class="card">
            <div class="card-header" th:text="${item.id}"> <!-- item의 id 출력 -->
            </div>
            <div class="card-body">
                <h5 class="card-title" th:text="${item.title}"></h5>
                <p class="card-text" th:text="${item.content}"></p>
                <!-- 여기를 수정 -->
                <a class="btn btn-warning" th:href="@{/articles/{id}(id=${item.id})}">보러 가기</a>
            </div>
        </div>
        <br>
    </div>

</div>

</body>
2-4. 실행 테스트하기
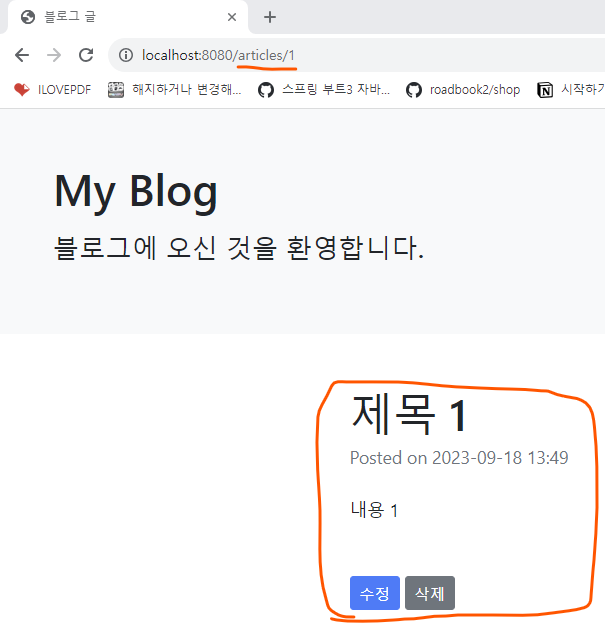
3. 삭제 기능 추가하기
3-1. 삭제 기능 코드 작성하기
1) article.js 생성
// 삭제 기능
const deleteButton = document.getElementById('delete-btn');<!-- 이거 중요 -->
if (deleteButton) {
deleteButton.addEventListener('click', event => {
let id = document.getElementById('article-id').value;
fetch(`/api/articles/${id}`, {
method: 'DELETE'
})
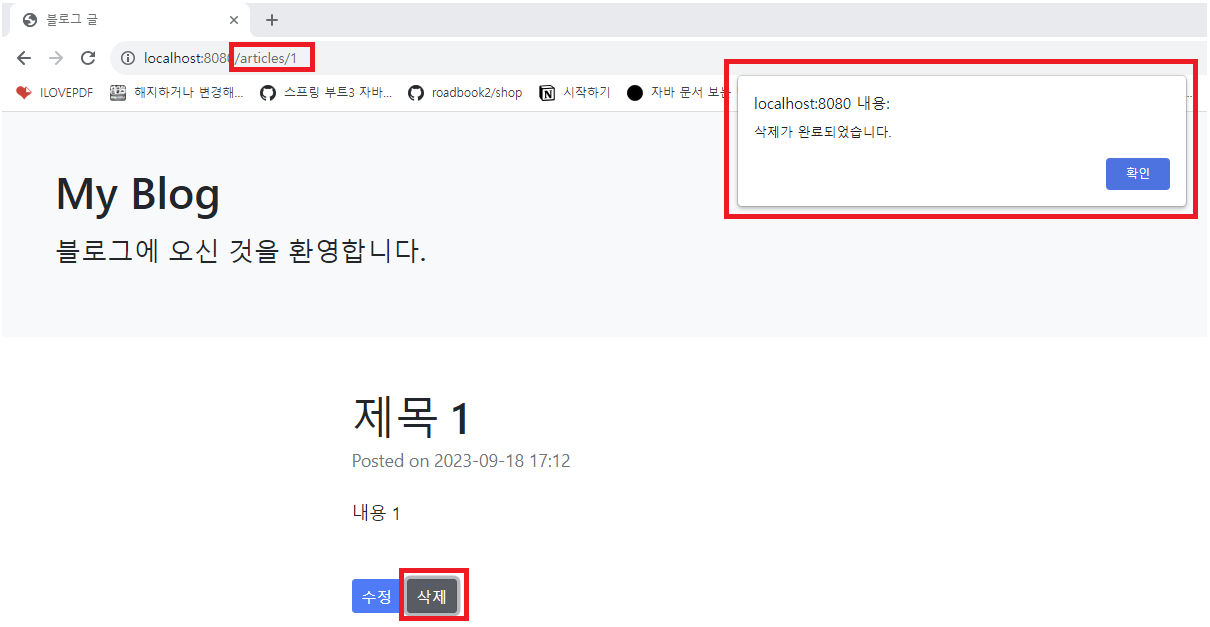
.then(() => {
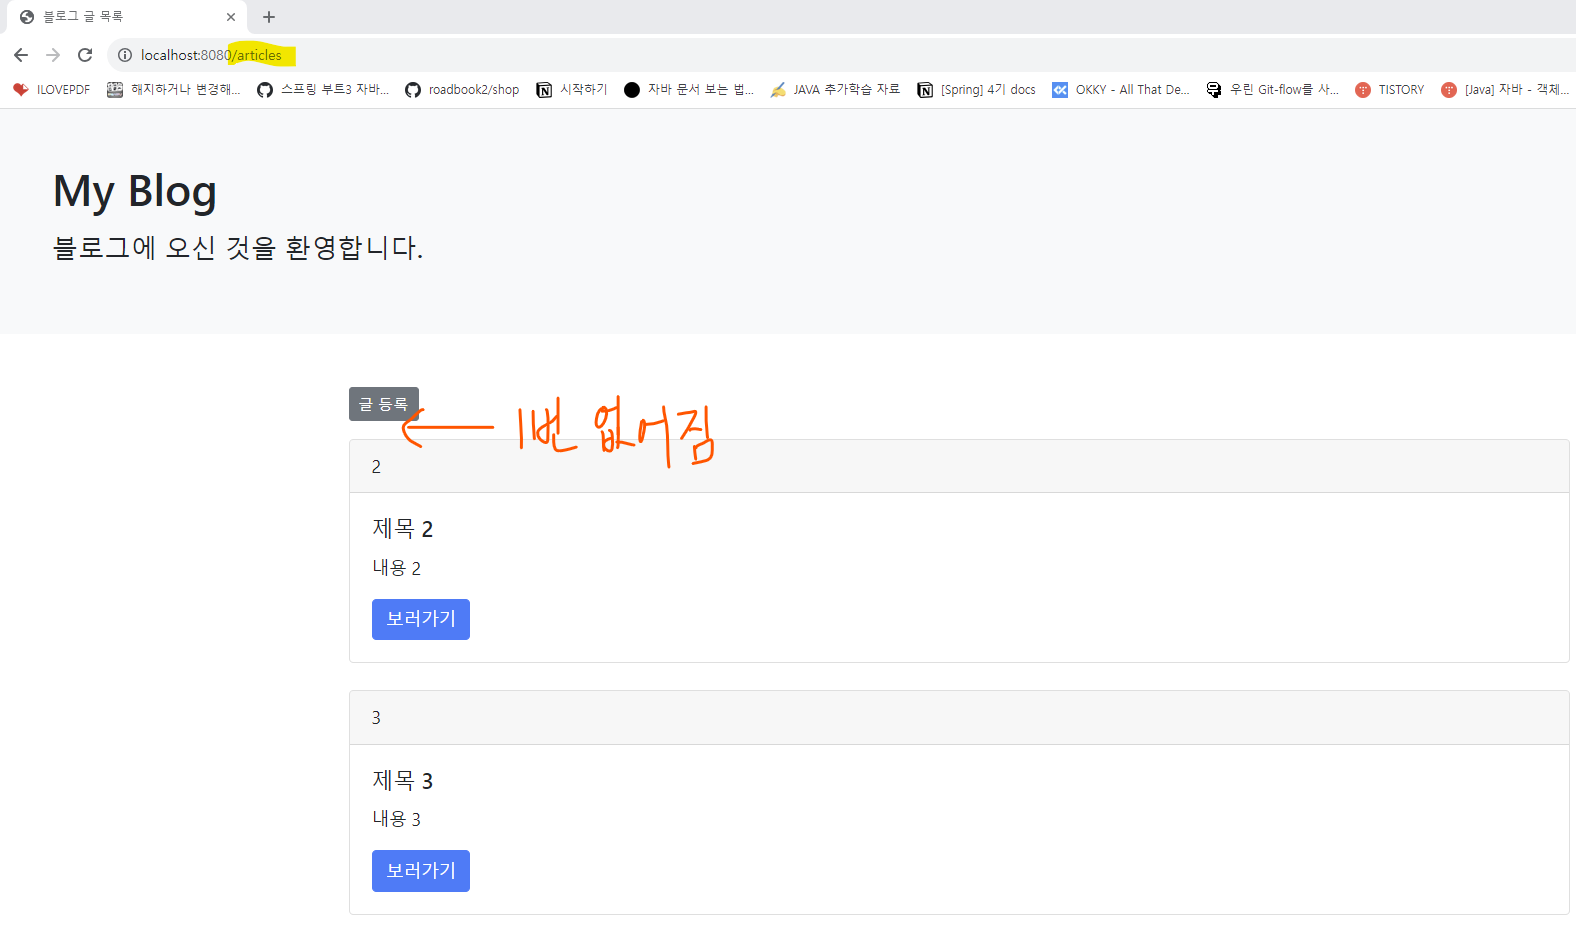
alert('삭제가 완료되었습니다.');
location.replace('/articles');
});
});
}
2) article.html 에 delete-btn 아이디값 추가
<!DOCTYPE html>
<html xmlns:th="http://www.thymeleaf.org">
<head>
  <meta charset="UTF-8">
  <title>블로그 글</title>
  <link rel="stylesheet" href="https://stackpath.bootstrapcdn.com/bootstrap/4.1.3/css/bootstrap.min.css">
</head>
<body>
  <div class="p-5 mb-5 text-center</> bg-light">
    <h1 class="mb-3">My Blog</h1>
    <h4 class="mb-3">블로그에 오신 것을 환영합니다.</h4>
  </div>

  <div class="container mt-5">
    <div class="row">
      <div class="col-lg-8">
        <article>
          <input type="hidden" id="article-id" th:value="${article.id}"> <!--추가-->
          <header class="mb-4">
            <h1 class="fw-bolder mb-1" th:text="${article.title}"></h1>
            <div class="text-muted fst-italic mb-2" th:text="|Posted on ${#temporals.format(article.createdAt, 'yyyy-MM-dd HH:mm')}|"></div>
          </header>
          <section class="mb-5">
            <p class="fs-5 mb-4" th:text="${article.content}"></p>
          </section>

          <button type="button" id="delete-btn" <!--추가-->
                  class="btn btn-secondary btn-sm">삭제</button>
        </article>
      </div>
    </div>
  </div>

  <script src="/js/article.js"></script> <!--추가-->
</body>
3-2. 실행 테스트하기
4. 수정, 생성 기능 추가하기
그림으로 설계 흐름 잡기
[그림]
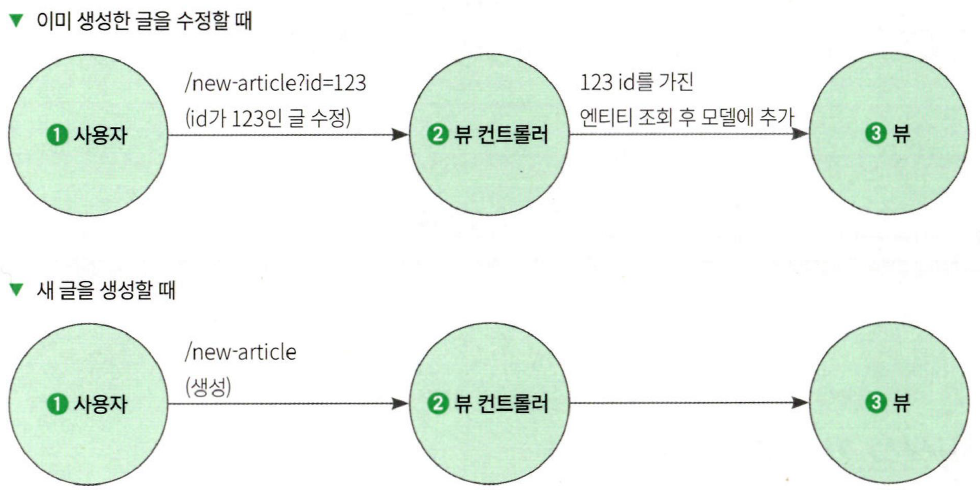
- 글을 생성할 때는 URL에 별도 쿼리 파라미터가 없다.
- 하지만 수정할 때는 수정할 글의 id를 쿼리 파라미터에 추가해 요청한다.
- 쿼리 파라미터란 HTTP 요청에서 URL의 끝에 '?' 로 시작하는 키 /값으로 이루어진 문자열. & 으로 구분.
- 즉, 쿼리 파라미터가 있는 경우 컨트롤러 메서드는 수정을 해야 하므로 엔티티를 조회하여 기존 글 데이터를 모델에 넣어 화면에 보여줘야 한다.
- 쿼리 파라미터가 없을 때에는 새 글이므로 화면에 아무 것도 보여줄 필요가 없다.
- 또한 뷰에선 쿼리 파라미터의 id 여부에 따라 [수정]과 [생성] 중 적절한 버튼을 보여줘야 한다.
4-1. 수정 화면 컨트롤러 코드
1) BlogViewController
@RequiredArgsConstructor
@Controller
public class BlogViewController {

    private final BlogService blogService;

    @GetMapping("/articles")
    public String getArticles(Model model) {
        // 블로그 글 목록을 조회하고, 각 글을 ArticleListViewResponse 객체로 변환하여 리스트로 저장
        List<ArticleListViewResponse> articleList
                = blogService.findAll()
                .stream()
                .map(ArticleListViewResponse::new)
                .toList();

        // 블로그 글 목록을 뷰에서 사용할 수 있도록 모델에 추가
        model.addAttribute("articles", articleList); // 블로그 글 리스트 저장

        // "articleList" 뷰를 반환
        return "articleList"; // 뷰 조회
    }

    @GetMapping("/articles/{id}")
    public String getArticle(@PathVariable Long id, Model model) {
        // 요청된 ID에 해당하는 블로그 글을 블로그 서비스를 통해 조회
        Article article = blogService.findById(id);
        // 조회한 블로그 글을 "article"라는 이름으로 모델에 추가
        model.addAttribute("article", new ArticleViewResponse(article));

        return "article"; // "article" 뷰를 반환
    }


    //추가

    @GetMapping("/new-article")
    public String newArticle(@RequestParam(required = false) Long id, Model model) {
        if (id == null) {
            // 'id' 파라미터가 null인 경우,
            // 새로운 블로그 글 작성을 위한 빈 ArticleViewResponse 객체를 모델에 추가.
            model.addAttribute("article", new ArticleViewResponse());
        } else {
            // 'id' 파라미터가 존재하는 경우, 해당 ID에 해당하는 블로그 글을 조회하여 모델에 추가.
            Article article = blogService.findById(id);
            model.addAttribute("article", new ArticleViewResponse(article));
        }

        // 'newArticle' 뷰를 반환.
        return "newArticle";
    }
}
4-2. 수정/생성 뷰 만들기
1) newArticle.html
<!DOCTYPE html>
<html xmlns:th="http://www.thymeleaf.org">
<head>
  <meta charset="UTF-8">
  <title>블로그 글</title>
  <link href="https://stackpath.bootstrapcdn.com/bootstrap/4.1.3/css/bootstrap.min.css" rel="stylesheet">
</head>
<body>
<div class="p-5 mb-5 text-center</> bg-light">
  <!-- 페이지 상단의 헤더 영역 -->
  <h1 class="mb-3">My Blog</h1>
  <h4 class="mb-3">블로그에 오신 것을 환영합니다.</h4>
</div>

<div class="container mt-5">
  <div class="row">
    <div class="col-lg-8">
      <article>
        <!-- 아이디 정보 저장 -->
        <input id="article-id" th:value="${article.id}" type="hidden">

        <header class="mb-4">
          <input class="form-control" id="title" placeholder="제목" th:value="${article.title}" type="text">
        </header>
        <section class="mb-5">
          <textarea class="form-control h-25" id="content" placeholder="내용" rows="10"
                    th:text="${article.content}"></textarea>
        </section>
        <!--id가 있을 때는 수정 버튼을, 없을 때는 등록 버튼이 보이게 함. -->
        <button class="btn btn-primary btn-sm" id="modify-btn" th:if="${article.id} != null" type="button">수정</button>
        <button class="btn btn-primary btn-sm" id="create-btn" th:if="${article.id} == null" type="button">등록</button>
      </article>
    </div>
  </div>
</div>

<script src="/js/article.js"></script>
</body>
2) article.js에 수정 코드 추가하기
// 수정 기능
const modifyButton = document.getElementById('modify-btn');

if (modifyButton) {
    modifyButton.addEventListener('click', event => {
        let params = new URLSearchParams(location.search);
        let id = params.get('id');

        fetch(`/api/articles/${id}`, {
            method: 'PUT',
            headers: {
                "Content-Type": "application/json",
            },
            body: JSON.stringify({
                title: document.getElementById('title').value,
                content: document.getElementById('content').value
            })
        })
            .then(() => {
                alert('수정이 완료되었습니다.');
                location.replace(`/articles/${id}`);
            });
    });
}
3) article.html에 id값과 클릭 이벤트 추가하기
<!DOCTYPE html>
<html xmlns:th="http://www.thymeleaf.org">
<head>
  <meta charset="UTF-8">
  <title>블로그 글</title>
  <link rel="stylesheet" href="https://stackpath.bootstrapcdn.com/bootstrap/4.1.3/css/bootstrap.min.css">
</head>
<body>
  <div class="p-5 mb-5 text-center</> bg-light">
    <h1 class="mb-3">My Blog</h1>
    <h4 class="mb-3">블로그에 오신 것을 환영합니다.</h4>
  </div>

  <div class="container mt-5">
    <div class="row">
      <div class="col-lg-8">
        <article>
          <input type="hidden" id="article-id" th:value="${article.id}">
          <header class="mb-4">
            <h1 class="fw-bolder mb-1" th:text="${article.title}"></h1>
            <div class="text-muted fst-italic mb-2" th:text="|Posted on ${#temporals.format(article.createdAt, 'yyyy-MM-dd HH:mm')}|"></div>
          </header>
          <section class="mb-5">
            <p class="fs-5 mb-4" th:text="${article.content}"></p>
          </section>

          <button type="button" id="modify-btn" <!-- 추가 -->
                  th:onclick="|location.href='@{/new-article?id={articleId}(articleId=${article.id})}'|"
                  class="btn btn-primary btn-sm">수정</button>

          <button type="button" id="delete-btn"
                  class="btn btn-secondary btn-sm">삭제</button>
        </article>
      </div>
    </div>
  </div>

  <script src="/js/article.js"></script>
</body>
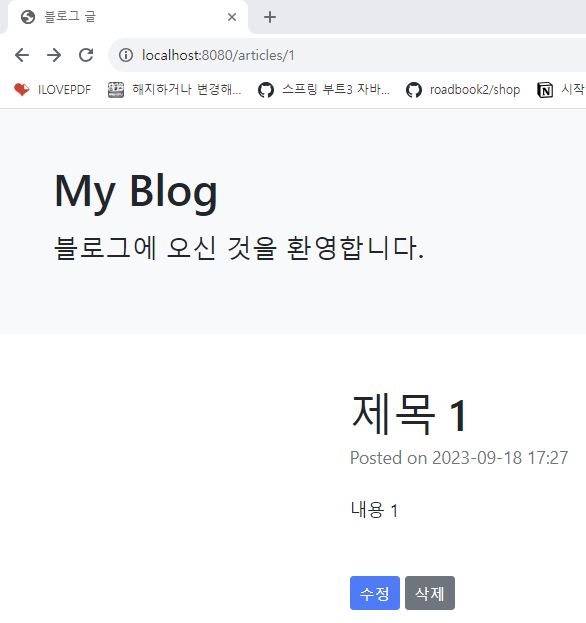
4-3. 실행 테스트하기
원상태 글
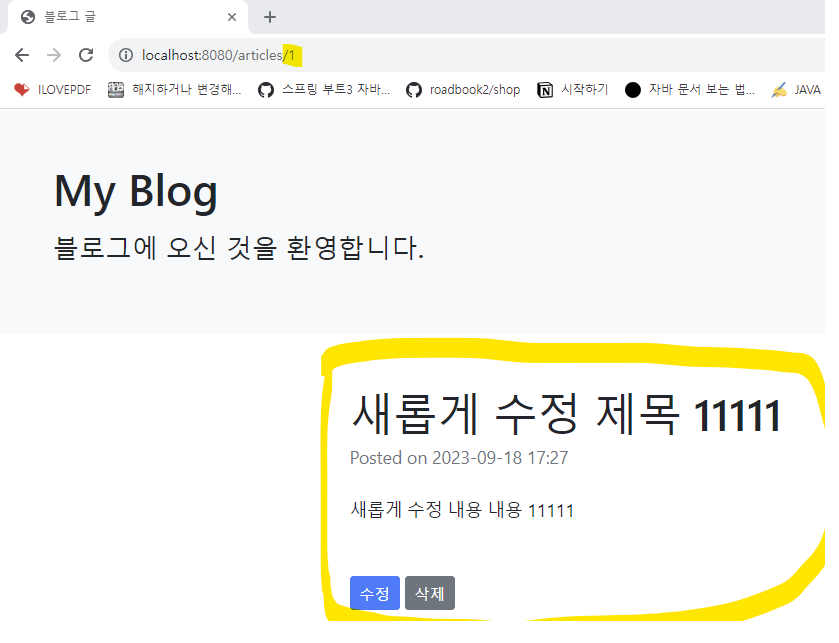
수정 제목, 내용을 입력하고 버튼 누르면

바뀐 것 확인 가능
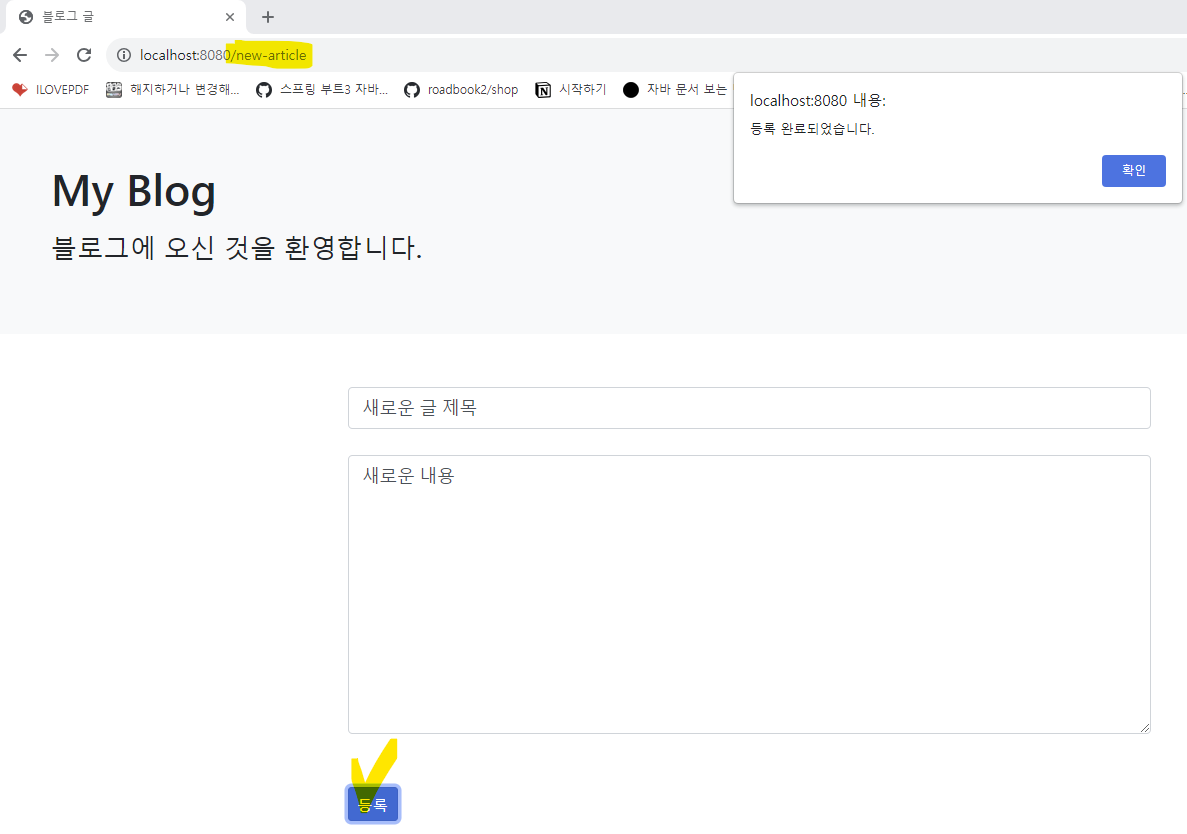
4-4. 생성 기능 작성하기
1) article.js에 [등록] 버튼 누르면 입력 칸에 있는 데이터를 가져와 게시글 생성 API에 생성 관련 요청 보내는 코드 추가
// 생성 기능
const createButton = document.getElementById('create-btn');

if (createButton) {
    createButton.addEventListener('click', event => {
        fetch('/api/articles', {
            method: 'POST',
            headers: {
                "Content-Type": "application/json",
            },
            body: JSON.stringify({
                title: document.getElementById('title').value,
                content: document.getElementById('content').value
            })
        })
            .then(() => {
                alert('등록 완료되었습니다.');
                location.replace('/articles');
            });
    });
}
2) article.html에 생성 버튼 추가
<!DOCTYPE html>
<html xmlns:th="http://www.thymeleaf.org">
<head>
    <meta charset="UTF-8">
    <title>블로그 글 목록</title>
    <link rel="stylesheet" href="https://stackpath.bootstrapcdn.com/bootstrap/4.1.3/css/bootstrap.min.css">
</head>
<body>
    <div class="p-5 mb-5 text-center</> bg-light">
        <h1 class="mb-3">My Blog</h1>
        <h4 class="mb-3">블로그에 오신 것을 환영합니다.</h4>
    </div>

    <div class="container">

    	<!-- 추가 -->
        <button type="button" id="create-btn"
                th:onclick="|location.href='@{/new-article}'|"
                class="btn btn-secondary btn-sm mb-3">글 등록</button>


        <div class="row-6" th:each="item : ${articles}">
            <div class="card">
                <div class="card-header" th:text="${item.id}">
                </div>
                <div class="card-body">
                    <h5 class="card-title" th:text="${item.title}"></h5>
                    <p class="card-text" th:text="${item.content}"></p>
                    <a th:href="@{/articles/{id}(id=${item.id})}" class="btn btn-primary">보러가기</a>
                </div>
            </div>
            <br>
        </div>
    </div>

    <script src="/js/article.js"></script>
</body>
4-5. 실행 테스트하기
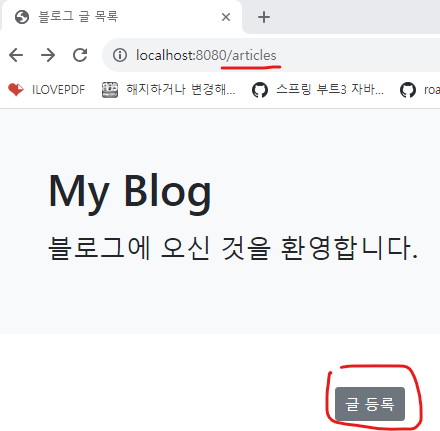
새로운 글 등록 화면
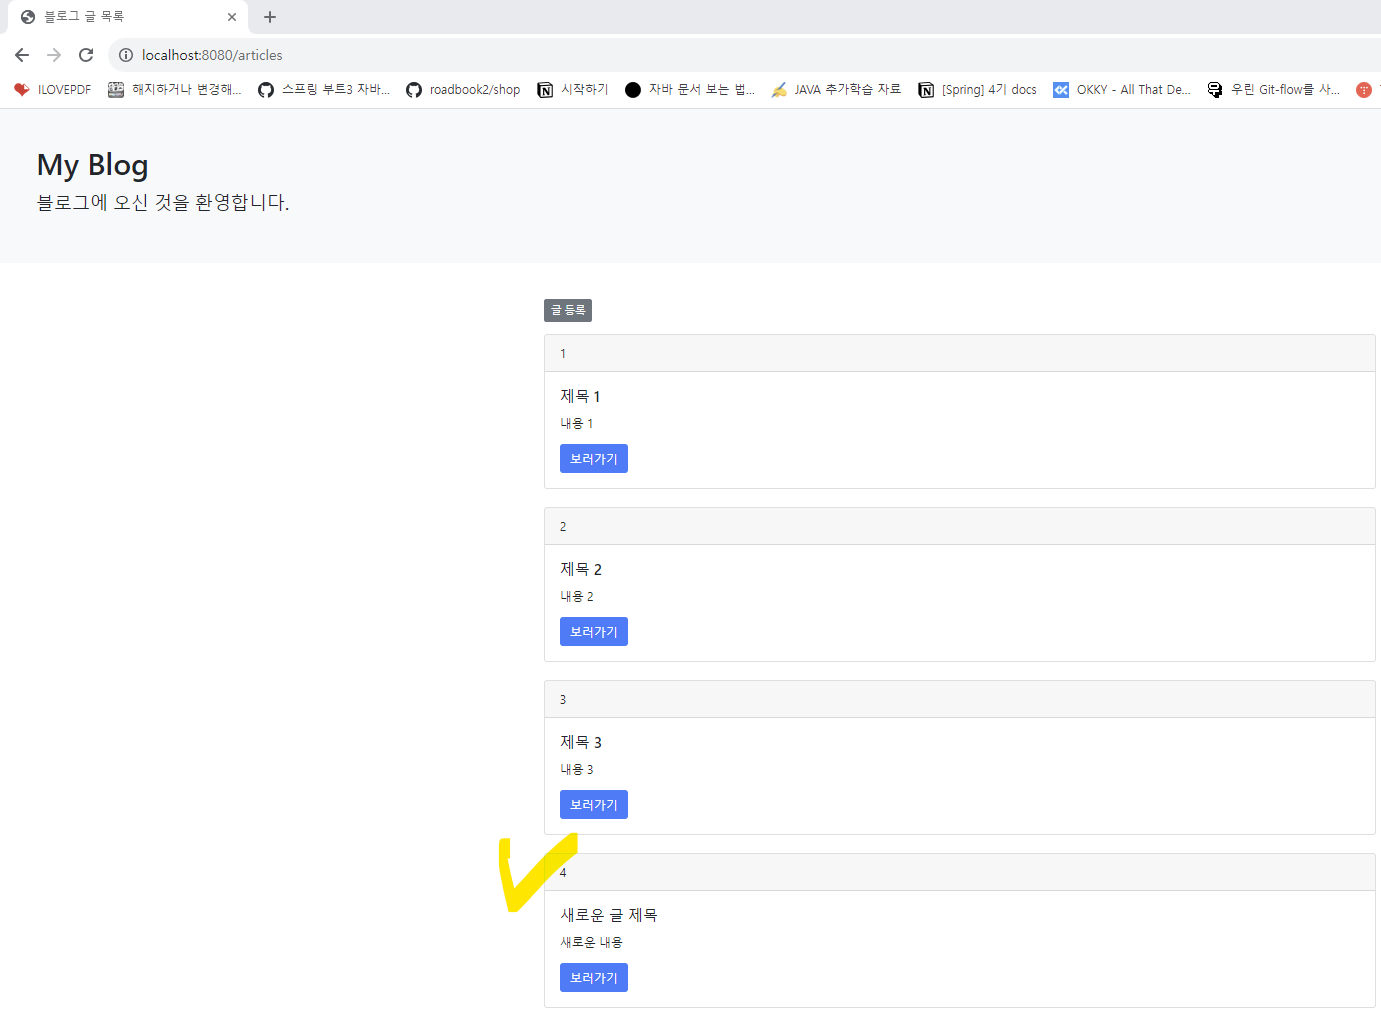
새로운 글 확인 가능
'[개발] - Spring > [개발예제] - SpringBoot - 블로그 만들기' 카테고리의 다른 글
| [사전 지식] 타임리프 (0) | 2023.10.14 |
|---|---|
| 블로그 글 삭제 API (1) | 2023.10.14 |
| 블로그 글 수정 API (1) | 2023.10.13 |
| 블로그 글 (목록/단일) 조회 API (1) | 2023.10.13 |
| 블로그 글 작성(생성) API (0) | 2023.10.12 |


